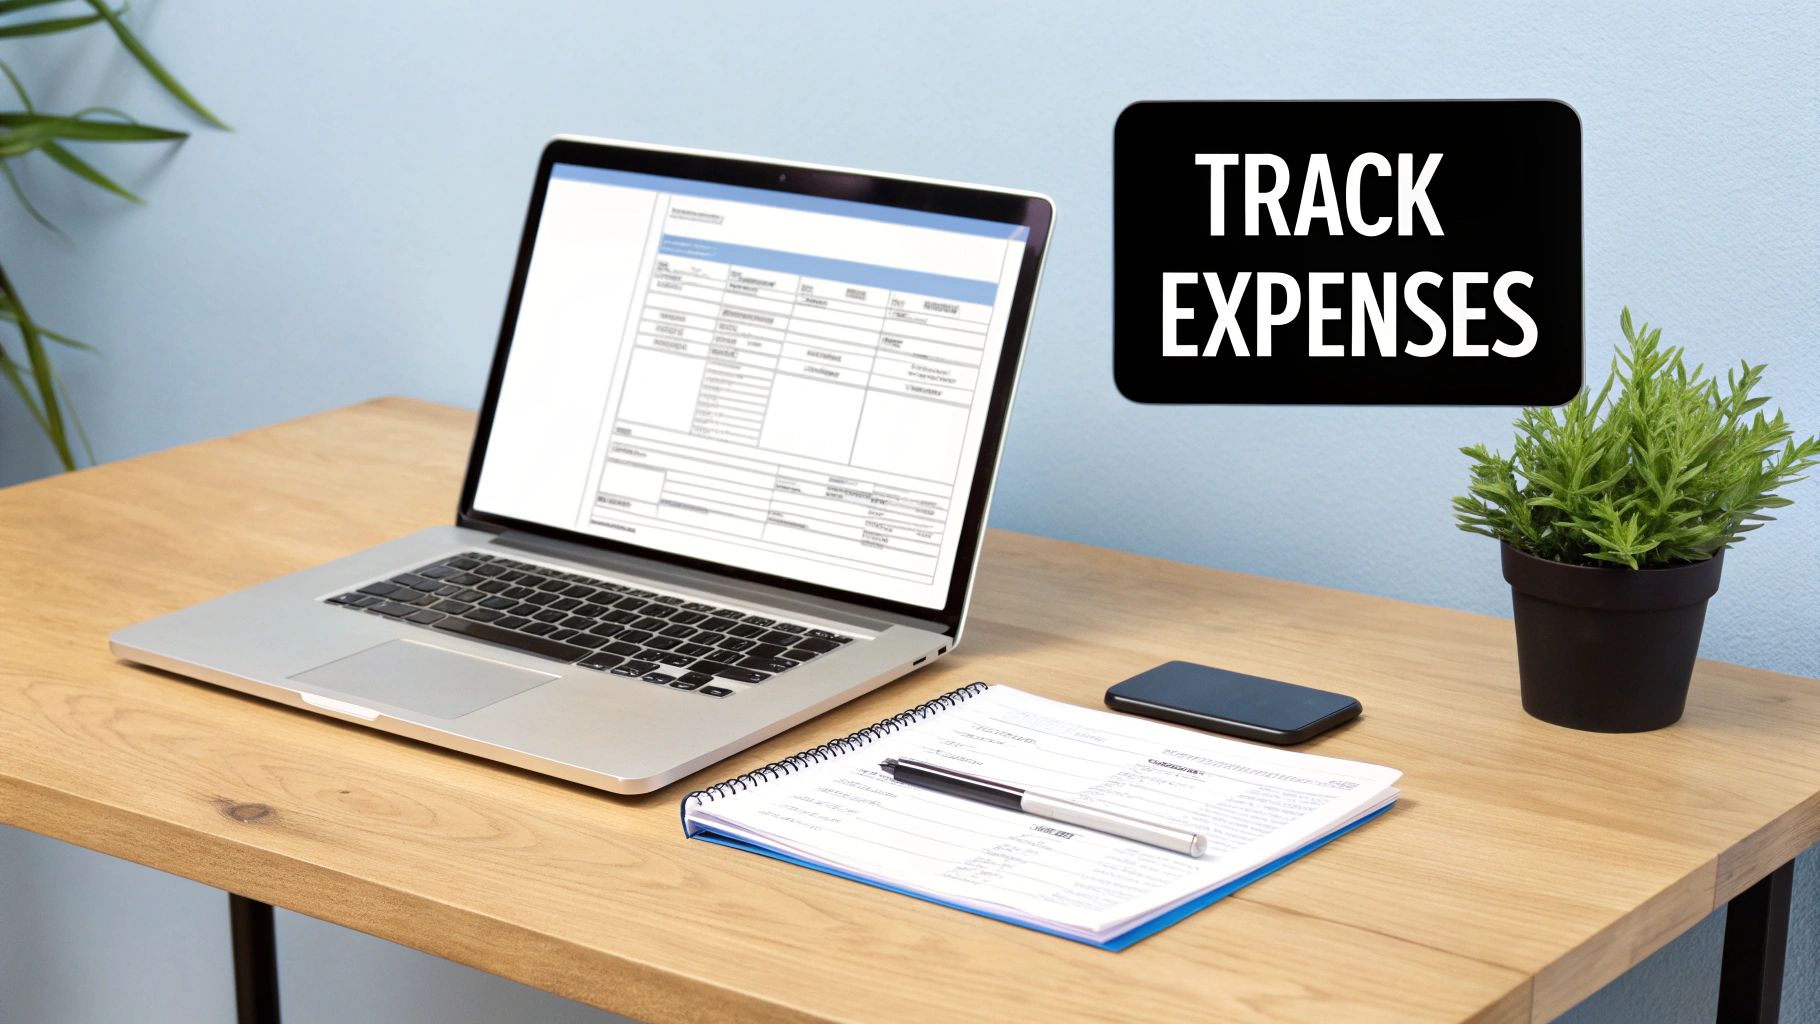
How to Track Business Expenses: Simple Guide & Best Practices
Discover how to track business expenses with a simple workflow, smart tools, and receipt tips to stay organized and tax-ready.
If you want to get a handle on your business expenses, you need to do three things right out of the gate: separate your personal and business finances, create a sensible set of spending categories, and pick a tool you'll actually use. It can be a simple spreadsheet or dedicated software—the important thing is to have a system.
Getting this foundation right is what separates a clear financial picture from total chaos come tax time.
Laying the Groundwork for Your Expense Tracking System
Before you even think about logging that first coffee receipt, you need a plan. So many freelancers and small business owners I've seen just dive in, stuffing receipts into a shoebox without any real strategy. That approach always ends in a disorganized mess, making tax season a nightmare and offering zero real insight into the business.
Let’s be clear: tracking expenses isn't just about finding tax deductions. It's about truly understanding your cash flow, knowing if you're actually profitable, and being able to make smart decisions based on real numbers. If you don’t know where your money is going, you’re flying blind.
Open a Dedicated Business Account—Yesterday
This is the single most important thing you can do. Open a separate bank account and credit card just for your business. Mixing personal and business spending is the classic mistake that makes bookkeeping a tangled nightmare.
When every dollar your business earns and spends runs through its own dedicated accounts, you automatically create a clean, easy-to-follow financial record. This isn't just a "nice to have" best practice; it dramatically simplifies everything from reconciling your books to spotting deductions. It’s the clean slate every business owner deserves.
Figure Out Your Expense Categories
With your finances now separate, the next step is to decide how you’ll sort your spending. Creating logical expense categories is what turns a long list of transactions into useful information. Don't just grab a generic list from the internet; think about how your business actually spends money.
A freelance writer, for example, might need categories like "Software Subscriptions," "Professional Development," and "Marketing." A woodworker, on the other hand, would have "Raw Materials," "Shipping Supplies," and "Studio Rent." The goal is to create buckets that tell you a story about your costs at a glance. You can dive deeper into this process in our guide covering the fundamentals of what is expense management.
A good categorization system does way more than just get you ready for taxes. It shows you spending patterns, flags areas where costs are creeping up, and helps you build much more accurate budgets down the road.
This isn't just a small business problem. A huge analysis of over £60 million in expense claims revealed that 70% of finance teams are desperate for real-time visibility into company spending. It’s no surprise, then, that 87% of CFOs are now investing in automation to cut down on errors and stay compliant. It just goes to show how critical a structured system is, no matter your company's size. You can see more insights about these expense management trends on captureexpense.com.
Pick Your Weapon: Choosing a Tracking Tool
With your accounts and categories ready, the last piece of the puzzle is your tool. You don't need anything fancy to get started. Honestly, the best tool is the one you’ll stick with.
Here are your main options:
- Spreadsheets: Programs like Google Sheets or Microsoft Excel are free, incredibly flexible, and a great starting point. They require you to enter everything manually, but you have total control.
- Dedicated Software: As you grow, apps like QuickBooks, Xero, or Wave can be a lifesaver. They offer features like receipt scanning, automatic bank syncing, and reporting that save a ton of time and prevent human error.
To get you started, I've put together a table of common expense categories that fit most freelancers and small businesses. Use this as a jumping-off point to build a system that makes sense for you.
Essential Business Expense Categories and Examples
This table breaks down some common, tax-deductible business expense categories to help you start organizing your spending immediately.
| Category | Description | Examples |
|---|---|---|
| Office Supplies | Consumable items used for daily administrative tasks. | Paper, ink cartridges, pens, notebooks, postage. |
| Software & Subscriptions | Recurring costs for digital tools and services. | Adobe Creative Cloud, Microsoft 365, project management apps. |
| Marketing & Advertising | Expenses related to promoting your business. | Social media ads, business cards, website hosting, SEO tools. |
| Travel | Costs incurred while traveling for business purposes. | Airfare, hotel stays, rental cars, rideshares to meetings. |
| Meals | Food and drink costs for business meetings or travel. | Lunch with a client, coffee meetings, meals on a business trip. |
| Professional Services | Fees paid to other professionals for their expertise. | Accountant fees, legal consultations, hiring a contractor. |
| Utilities | Costs for essential services like internet and phone. | Business internet plan, dedicated business phone line. |
Think of these categories as a starting point. Feel free to add, remove, or rename them to perfectly match the way your business operates. The more customized it is, the more valuable the insights will be.
Mastering Digital Receipt and Invoice Capture
Let’s be honest, paper receipts are a pain. They end up lost in a wallet, faded on the car dashboard, or in a shoebox that makes expense tracking feel like an archeological dig. Going digital isn't just about being neat; it's about building a searchable, permanent archive of every single business expense.
The second a transaction happens, the clock starts ticking on that piece of paper. I've learned the hard way that the only way to win this battle is to capture receipts immediately. My own system is pretty simple: a good scanning app on my phone and a dedicated email address just for digital invoices.
Building Your Digital Archive System
The goal here is to kill the "I'll deal with this later" pile before it even starts. You have to make capturing receipts a reflex, something you do the moment you get one. It doesn't require a complex setup, just a couple of smart habits.
- For physical receipts: Grab your phone and use an app like Adobe Scan or even the built-in notes app. Snap a clear picture right after the purchase—at the coffee shop, the gas pump, the office supply store. The quality is fantastic, and most apps will turn it into a clean PDF for you.
- For digital invoices: This one's even easier. When that software subscription or online order invoice hits your inbox, don't let it get buried. Immediately forward it to a dedicated receipts folder or save it directly into a designated cloud folder.
This two-pronged attack means every expense, whether paper or digital, lands in the same organized place. It completely changes the game by making information capture a habit, not a chore.
Capturing a receipt should take less than 30 seconds. If your system is any more complicated than that, you won't stick with it. The best process is always the one you actually use.
Naming Conventions and Cloud Storage
So you've captured the receipt—now what? A well-organized cloud storage solution like Google Drive, Dropbox, or OneDrive is your best friend. Remember, a chaotic digital folder is just as useless as a shoebox stuffed with crumpled paper.
A simple, consistent file naming system is absolutely critical. I've found this format to be practically foolproof:
YYYY-MM-DD_Vendor_Amount_Purpose.pdf
For example, a receipt for a client lunch becomes 2024-10-26_TheCornerBistro_45.50_LunchWithClientJaneDoe.pdf. This little bit of discipline upfront makes your files instantly sortable by date and searchable by vendor, amount, or purpose. You can find any expense in seconds, which is a lifesaver come tax time or during an audit.
Handling the Inevitable Lost Receipt
No matter how diligent you are, a receipt will eventually go missing. Don't panic and write off the deduction. When one disappears, your job is to reconstruct the record as accurately as you can.
Here’s the process I follow:
- Find the transaction: First, pull up your dedicated business bank or credit card statement. This proves the date, vendor, and exact amount.
- Document the purpose: Right away, create a note explaining the business purpose of the expense. What was it for? Who were you with? What was discussed? The more detail, the better.
- Create a placeholder: For your own records, you can fill the gap. A simple text file or a document made using a free online receipt template can serve as a substitute, containing all the info from your bank statement and your notes. While it's not an official receipt, it shows you're doing your due diligence.
This backup plan ensures your financial records stay complete, even when the original paper trail vanishes. It's a crucial fallback for painting an accurate picture of your spending and justifying every legitimate business expense.
Creating a Stress-Free Bookkeeping Routine
So, you've got all your receipts and invoices digitized and stored safely. Fantastic. But that’s only half the battle. Now you have to get that information into your books, and this is where most people’s good intentions go to die under a pile of tedious data entry. The secret isn't to magically find more time—it's to build a simple, repeatable routine that actually fits your schedule.
A consistent workflow is your best defense against that chaotic, year-end scramble for documents. I don't care if it's 15 minutes every morning with your coffee or a dedicated hour every Friday afternoon. The key is consistency. It prevents backlogs from piling up, keeps your financial picture current, and turns a huge, intimidating task into a manageable habit.
The first part of that routine is simply getting your paper receipts into a digital format. It’s a straightforward flow: paper becomes a digital file, safe in the cloud.
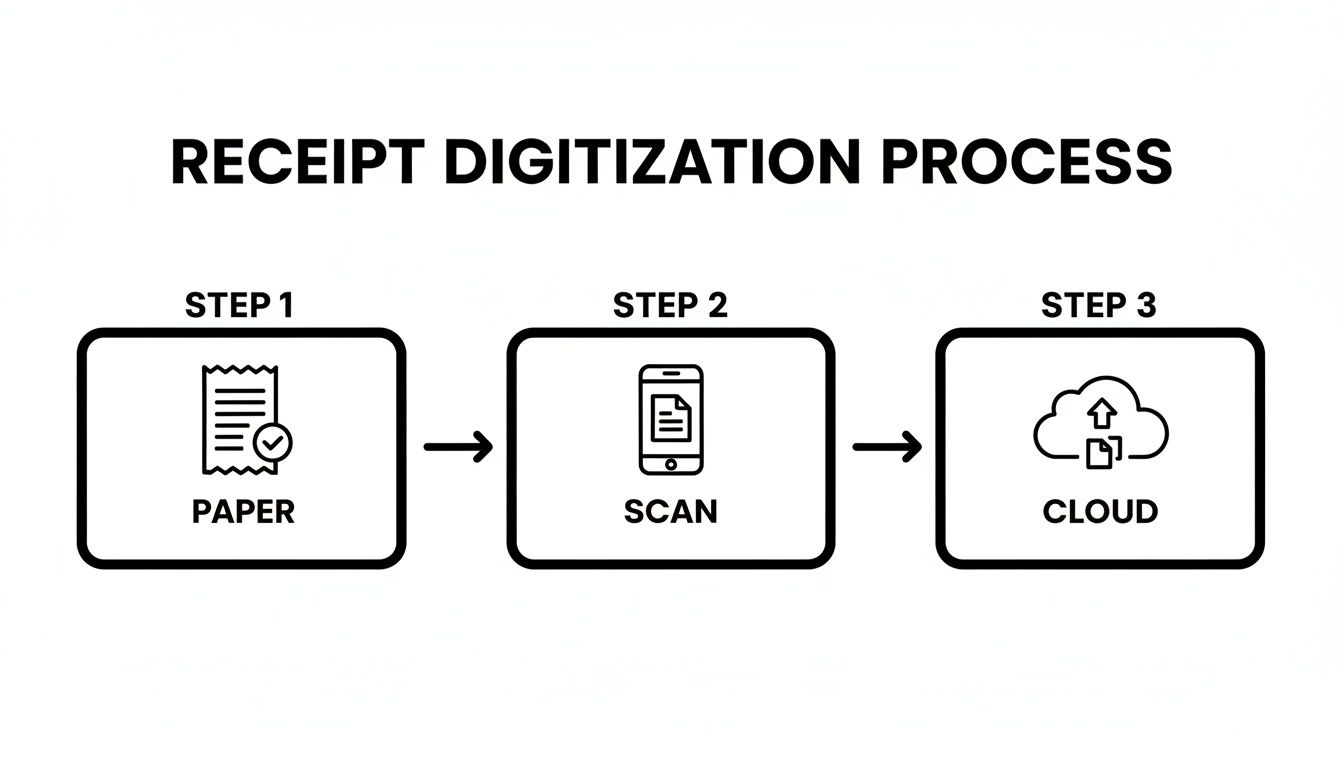
This simple act—snap a picture, upload it—is the foundation of an organized, stress-free system.
Choosing the Right Tool for Your Stage
Your bookkeeping tool should match where your business is right now. There’s no single "best" option, only what’s right for you. Don't overcomplicate things from day one; you can always upgrade as you grow.
- The Spreadsheet Method: If you're a freelancer or just starting out, a well-organized spreadsheet (like Google Sheets or Excel) is a perfect, no-cost way to begin. It forces you to actually understand your cash flow and gives you total control.
- Dedicated Accounting Software: Once you have a steady stream of transactions, software like QuickBooks, Xero, or Wave is a game-changer. These platforms can sync directly with your bank accounts, automatically suggesting expense categories and generating financial reports with a few clicks.
No matter what tool you use, the core job is the same: take the data from your digitized receipts and log it against the matching transaction from your business bank account. For more pointers on getting your first system in place, check out these essential small business bookkeeping tips.
The Non-Negotiable Step: Reconciliation
Listen, if there's one part of the routine you absolutely cannot skip, it’s reconciliation. This just means methodically matching every single transaction in your books to the corresponding entry on your business bank and credit card statements. It sounds boring, I know, but this is your ultimate quality control.
Think of it exactly like balancing your personal checkbook. You’re just comparing your records to the bank’s to confirm everything is accurate and accounted for.
Reconciliation is the firewall between organized books and expensive financial chaos. It’s where you catch bank errors, spot fraudulent charges, find duplicate payments, and guarantee your financial reports are 100% reliable.
Skipping this is like building a house on a shaky foundation. Sooner or later, it's going to cause problems. Committing to a regular reconciliation schedule—weekly or monthly—is the single most powerful habit you can build for maintaining a crystal-clear view of your business's financial health.
A Sample Bookkeeping Workflow
To put this into practice, here’s a simple routine you can adopt. Once you get the hang of it, you can probably knock this out in under an hour a week.
- Gather Your Data: Pull up your digital receipt folder and your business bank statement side-by-side on your screen.
- Log Each Expense: Go through your bank statement line by line. For each charge, find the matching digital receipt.
- Enter the Details: In your spreadsheet or accounting software, plug in the key info: date, vendor, amount, expense category, and a quick note on the business purpose.
- Mark as Reconciled: Once an item from your bank statement is logged and matched to a receipt in your books, check it off or mark it as reconciled.
This systematic approach makes sure nothing gets missed and every dollar is properly documented. It transforms bookkeeping from a dreaded marathon into a series of quick, manageable sprints, giving you constant clarity and control.
Put Automation to Work for You
Let's be honest: nobody starts a business because they love manually typing receipt details into a spreadsheet. It’s a tedious, soul-crushing task that drains time you could be spending on literally anything else. This is where a little bit of modern tech can make a world of difference, shifting your workflow from painful data entry to a smart, automated system.
The goal isn't to get fancy. It's to build a simple but effective tech stack that does the grunt work for you. We want to create a system where your financial data flows right from the cash register or online checkout into your books, with you barely having to lift a finger. This isn't just about saving a few minutes; it’s about winning back hours of your life and getting a real-time, accurate picture of where your money is going.
Let Your Phone Handle the Receipts with OCR
First things first, let's kill the paper problem. Most good expense tracking apps now use Optical Character Recognition (OCR), which is just a fancy way of saying they can read a receipt from a photo.
Instead of squinting at a faded piece of paper and typing out the vendor, date, and amount, you just let the app do it. All you have to do is snap a picture and give it a quick once-over to make sure it’s right.
- Here’s what that looks like in the real world: You just bought a new monitor from a local shop. Before you even leave the parking lot, you pull out your phone, open an app like Expensify or the one built into QuickBooks, and take a photo of the receipt. The app instantly grabs the key info: vendor (
Best Buy), date (October 26, 2024), and total ($499.99). Your only job is to tag it with your "Equipment" category. Done.
Making this a habit takes seconds and completely removes the "shoebox full of crumpled receipts" nightmare. It's the single most impactful change you can make to your process.
Connect Your Bank and Credit Card Feeds
The next big step is to hook up your business bank and credit card accounts directly to your bookkeeping software. When you securely link them, you’re basically giving your software permission to automatically import every single transaction as it clears.
This creates a live, running feed of your financial life, making it nearly impossible for anything to slip through the cracks. The software is also smart enough to learn your habits and will start suggesting expense categories for you.
Think of bank feeds as your financial watchdog. They create a complete, undeniable record of every dollar that moves in and out of your business, serving as the ultimate source of truth for your bookkeeping.
For instance, your accounting platform will see that recurring $15.99 charge from "Zoom Video Communications" every month. The first time it appears, you’ll categorize it as "Software & Subscriptions." From then on, the system will recognize it and do it for you, saving you from that same repetitive click month after month.
Building Your Hands-Off Workflow
When you put these pieces together, you get a beautiful, seamless flow of information that you barely have to manage. The whole point is to touch each transaction just once—or, ideally, not at all.
Here’s how these tools work together to create a seriously efficient system for tracking business expenses:
First, a transaction happens. Let’s say your business credit card is charged for a new marketing tool. Within a day or two, that transaction is automatically pulled into your accounting software through the bank feed.
Next, you handle the receipt. You get a digital invoice in your email, so you just forward it to a special email address your software provides. The system's OCR scans it, pulls the data, and cleverly matches the amount and vendor to the transaction that just came in from the bank.
Then, the system gets smart. It sees the vendor is "Mailchimp" and, remembering how you categorized it last time, automatically tags the expense as "Marketing & Advertising."
All that’s left is for you to do a quick review. Once a week, you pop into your software, look over the transactions that have been matched and categorized, and approve them with a click. Just like that, your books are perfectly up to date. This integrated system means you're no longer the one chasing down data; you're just the supervisor of a well-oiled machine.
Turning Your Records Into Actionable Reports

All that hard work capturing receipts and meticulously logging every transaction? This is where it pays off. This is the moment you stop looking at a list of numbers and start seeing the story of your business. A jumble of transactions is just noise, but a well-crafted report gives you real insight, makes tax season a breeze, and helps you bill clients like a pro.
Let’s be honest, we don't track expenses just for the fun of it. The goal is to use that information to make smarter decisions, get paid faster, and stay out of trouble with the IRS. Once your data is neatly categorized and reconciled, pulling these reports becomes a simple click of a button, not a weekend-long project.
Generating Reports for Tax Season
When tax time rolls around, organized expense data is your best friend. Instead of spending hours digging through a shoebox (digital or physical), you can instantly generate a profit and loss (P&L) statement or a clean summary of expenses by category. This is exactly what your accountant wants to see to file your return accurately and find every possible deduction.
If you’re a sole proprietor or freelancer, this is non-negotiable for filling out forms like the Schedule C (Form 1040). The IRS requires you to report your total income and break down your spending into specific buckets like advertising, office supplies, and travel.
With your expenses already sorted, you can generate a report that gives you the exact totals for each line item. A task that used to be a multi-hour headache becomes a five-minute job, dramatically cutting down on the risk of mistakes or missed deductions.
The goal is simple: hand your accountant a clean, summarized report, not a chaotic mess of uncategorized transactions. This saves you a ton on their hourly bill and ensures your tax filing is both accurate and defensible.
This detail is especially important for travel. With worldwide business travel spending projected to hit a record $1.64 trillion, you can't afford to be sloppy. One study even found that 54% of travel managers are most concerned with skyrocketing costs, noting that untracked expenses can lead to 20-25% overspends. For more on this, you can check out these business travel statistics on atlys.com. Properly reporting these costs is key for both tax write-offs and client reimbursements.
Creating Professional Reimbursement Reports
Do you ever incur out-of-pocket expenses for client work? If so, getting that money back quickly is crucial for your cash flow. A vague invoice with a single line for "expenses" is just asking for questions, payment delays, and awkward follow-up emails.
Instead, get in the habit of providing a detailed, professional expense report with every invoice. This simple document should break down every single cost you're billing back to the client, leaving no room for doubt.
A solid reimbursement report clearly lists the following for each expense:
- Date: When you spent the money.
- Vendor: Who you paid (e.g., Delta Air Lines, Hilton, Uber).
- Category/Purpose: A short but clear description (e.g., "Flight to NYC client meeting," "Client lunch at The Palm," "Parking for conference").
- Amount: The exact cost to be reimbursed.
You can whip this up in a spreadsheet or, even better, have your accounting software generate it for you. The whole point is transparency. When a client sees exactly what they’re paying for, they’re far more likely to approve the invoice without a second thought. It’s a small step that builds trust, reinforces your professionalism, and ultimately helps you get paid faster.
Got Questions About Tracking Business Expenses? We've Got Answers
Even with a great system, you're bound to run into some specific questions once you start tracking your business spending. These are the little details that can trip people up. Let's clear up some of the most common ones so you can track everything with confidence.
What's the Easiest Way for a Freelancer to Track Expenses?
If you're a freelancer just starting out, keep it simple. The absolute easiest way to get a handle on your expenses is with two things: a dedicated business bank account and a basic spreadsheet. You can use something free like Google Sheets and it'll get the job done beautifully.
In your spreadsheet, just create columns for the Date, Vendor, Category, Amount, and a quick note about the business purpose. That’s it. You’ll have a clean, running list of every dollar you spend.
For receipts, don't let them pile up. Grab a free scanning app like Adobe Scan for your phone. The second you get a receipt, snap a photo and save it to a cloud folder on Google Drive or Dropbox. This simple duo—a spreadsheet log and instant receipt capture—gives you total control without the headache of learning complex accounting software right away.
How Long Should I Keep Business Expense Records?
The IRS says you need to hang onto your records for at least three years from the date you filed your tax return. But honestly, that's the absolute minimum. In business, it's always better to be safe than sorry.
Most accountants and experienced business owners will tell you to keep everything for seven years. Why? Because that longer timeframe covers you for more unusual situations, like if the IRS wants to look back at bad debt deductions or other financial claims.
Think about it: digital storage is incredibly cheap these days. There's really no good reason not to keep a permanent digital archive of your records. It offers the best possible protection and gives you a treasure trove of historical data you can use to see how your business has grown over time.
Can I Claim an Expense if I Lost the Receipt?
We've all been there. It’s frustrating, but a lost receipt doesn't automatically mean you lose the deduction. For smaller expenses—generally anything under $75—you can often prove the expense without the original paper copy, as long as you have other solid evidence.
Your backup proof should include:
- A credit card or bank statement that clearly shows the vendor, date, and amount.
- A note in your expense log from around the time you made the purchase, explaining what it was for.
For anything over that amount, the receipt becomes much more important. If you lose one for a significant purchase, your first step should be to contact the vendor. Many can email you a digital copy without any fuss. If that doesn't work, make sure your bank statement and a detailed note in your own records are there to back you up.
What Are the Most Common Expense Tracking Mistakes?
It's easy to make a few missteps when you're getting started. Knowing what they are ahead of time is the best way to avoid them and keep your books clean.
Here are the biggest mistakes I see business owners make:
- Mixing Business and Personal: Using one bank account for everything is the cardinal sin of bookkeeping. It creates a tangled nightmare that takes forever to unravel come tax time.
- Waiting Too Long: Letting receipts pile up in a shoebox or a folder for weeks is a recipe for disaster. What starts as a quick 5-minute task becomes a dreaded, multi-hour project filled with guesswork.
- Forgetting Cash Purchases: Those small cash expenses for parking, a tip at a business lunch, or coffee with a client are so easy to forget. But they add up—we're talking hundreds, even thousands, in missed deductions over a year.
- Leaving Out the "Why": A receipt just shows what you bought. Your records are incomplete without a quick note explaining the business purpose. That "why" is what justifies the deduction.
- Not Having a Backup: Keeping all your digital records on a single laptop is playing with fire. A simple cloud backup protects you from losing all that hard work if your device crashes.
When you've lost a receipt or need to create one for your records, having the right tool is essential. Receipt Maker lets you generate professional, customized receipts for any situation, helping you maintain complete and accurate expense logs. Create the exact receipt you need in seconds.