Your Guide to Using a Free Receipt Maker for Any Business
Discover how a free receipt maker can streamline your business. This guide offers practical steps to create, customize, and manage professional receipts.
A solid free receipt maker is basically an online tool that lets you whip up professional-looking receipts in just a few minutes, all without needing to install or learn complicated software. If you're running a small business, working as a contractor, or just need a quick proof of purchase for anything, it's a lifesaver for keeping your records straight and looking professional.
Why a Free Receipt Maker Is a Modern Business Essential
In business, how you're perceived and how efficiently you operate can make or break you. The days of scribbling transaction details on a spare piece of paper or wrestling with a word processor to format a decent-looking document are long gone.
Being able to create a clean, branded receipt on the spot isn't just a nice-to-have feature anymore—it's a fundamental part of running a business today. Making that simple switch from manual to digital saves a ton of time, cuts down on mistakes, and frankly, it's what your customers expect.
Think about a freelance photographer who just wrapped up a photoshoot. Instead of saying, "I'll email you the receipt later," they can create and send a polished, itemized PDF right from their phone before they even pack up their gear. It’s a small action, but it speaks volumes about their professionalism and makes their own expense tracking that much easier.
Get Your Financial Workflow in Order
A good free receipt maker does a lot more than just spit out a document; it helps organize your entire financial process. It takes the headache out of manually calculating taxes and discounts, which helps you avoid simple math errors that can become a real nightmare during bookkeeping. For a small shop or a local café owner, it's perfect for reprinting a lost receipt for a customer or for cashing out at the end of the day.
This kind of efficiency is a game-changer for a few key reasons:
- Spot-on Record-Keeping: Every transaction gets logged in a consistent format, which makes tax time way less of a scramble.
- Better Cash Flow Management: When you can clearly see what's coming in and going out, you have a much firmer grip on the financial health of your business.
- Polished Client Interactions: Sending a well-designed receipt right away builds trust and shows your clients you’re organized and on top of things.
A smooth receipt process is a tell-tale sign of a business that has its act together. It projects professionalism and ensures both you and your client have a clear, official record of the transaction, which is the bedrock of building lasting trust.
It's More Than Just a Piece of Paper
At the end of the day, a receipt is a critical final touchpoint in any transaction. For a contractor, it’s the final handshake on a job well done. For a small business, it’s the official proof of a sale and a crucial document for handling any future returns or warranty claims.
But the uses go even further. Think about a filmmaker who needs realistic-looking props for a scene, or a quality assurance team testing a new payment system—authenticity is key. A powerful free receipt maker gives you the flexibility to handle all these scenarios without dropping a fortune on enterprise-level accounting software, making it an indispensable tool for almost any operation.
Creating Your First Receipt in Minutes
Jumping into a new tool can sometimes feel daunting, but a good free receipt maker is built to be intuitive. Honestly, you can go from a blank slate to a professional, ready-to-send receipt in the time it takes to make a cup of coffee. The whole process is designed to be incredibly straightforward.
Your first decision is how to begin. Most tools give you a couple of options: pick a template or start from scratch. For instance, if you're a freelance photographer, you could grab a "Services" template that already has spots for project descriptions and hourly rates. It’s a huge time-saver. On the other hand, starting with a blank canvas gives you complete control to build a receipt that's perfectly tailored to your unique business.
Either way, the next part is plugging in the essential details—the non-negotiables that make a receipt an official proof of purchase.
- Your Business Information: This is where you add your company name, logo, and contact info. It’s what your customer sees first and immediately sets a professional tone.
- Essential Transaction Data: You’ll need to add the date of the sale and a unique receipt number. I can't stress this enough: using a sequential numbering system is a lifesaver for organized record-keeping and tracking payments down the road.
- Itemized Lines: Here's where you list each product or service, the quantity, and the price per unit. The tool does all the heavy lifting by calculating the subtotals and the final amount owed.
This flow chart gives you a bird's-eye view of how these simple inputs transform into a polished, professional document that helps you track every single transaction.
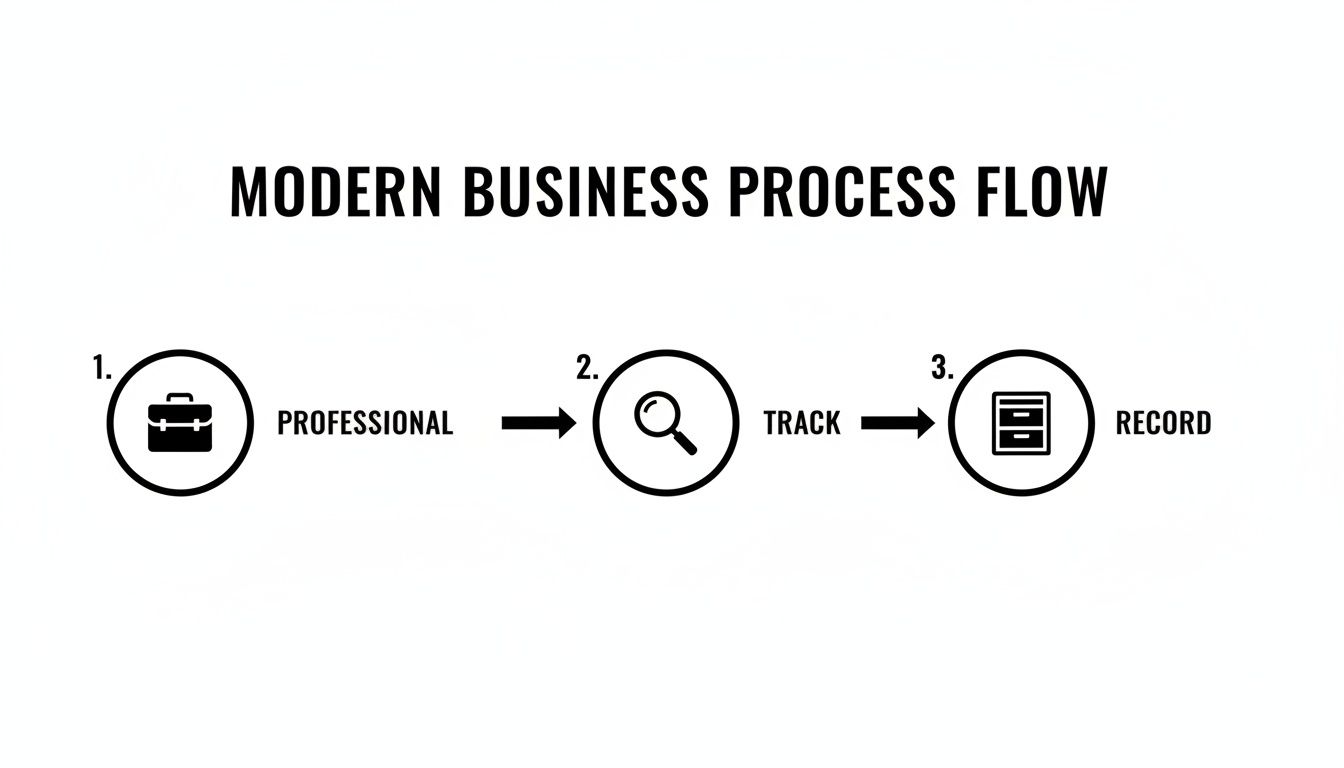
Moving from a professional setup to diligent tracking and secure recording really highlights how a simple tool can be central to maintaining your business's financial health.
The Final Touches Before You Send
Once the basics are locked in, it's time for the final financial details. This is where you can apply sales tax, add a discount (as a percentage or a flat amount), and specify the payment method, whether it was cash, credit card, or a digital wallet like Apple Pay.
The real magic of a free receipt maker is that it handles all the math for you. This completely sidesteps the human error that can easily creep in when you're fumbling with a spreadsheet or a basic document, ensuring every receipt is 100% accurate.
After a quick double-check, your receipt is good to go. You can download it as a PDF to email directly to your client or print a physical copy. The goal is to show you just how simple the whole process can be, getting you from zero to a finished, professional document without getting tangled up in complex settings.
For an even deeper dive, you can learn more about how to make a receipt online in our comprehensive guide.
Make Every Receipt a Reflection of Your Brand
Let's be honest, a generic receipt is just a piece of paper. It's a missed opportunity. But a sharp, customized receipt? That’s a mini-billboard that reinforces your brand, builds trust, and makes every transaction feel professional. This is where a free receipt maker really proves its worth—it lets you turn a basic proof of purchase into something that truly represents your business.
The most important thing you can do is put your brand front and center. This goes way beyond just typing your business name. You want to add all the key details that make it an official, trustworthy document.
- Your Logo: This is non-negotiable. Uploading a high-quality logo is the fastest way to make a receipt instantly recognizable as yours.
- Business Information: Be consistent. Always include your official business name, address (physical or mailing), and a good contact number or email.
- Tax Identification: For B2B sales or just to add a layer of legitimacy, including your Tax ID or VAT number is a pro move.

Nail the Details: What Was Actually Sold?
Once your branding is set, it’s time for the main event: the itemized list. Getting this right is crucial for clarity. A good receipt maker takes the guesswork out of this, giving you a clean, structured way to list every item and handling all the math for you.
For everything you sell, you can plug in the description, quantity, and unit price. Think about it from the customer’s perspective. A freelance graphic designer shouldn’t just put "Design Work." A much better entry would be "Logo Design Package - 3 Concepts" with a quantity of 1. That kind of detail eliminates any confusion down the road. As you punch in these items, the tool crunches the numbers and updates the subtotal instantly, so you don't have to worry about calculation errors.
The real beauty of an automated tool is that it nails the financial calculations every time. Subtotals, taxes, discounts—it’s all done for you. That accuracy is the foundation of trustworthy financial records.
Handle the Money Like a Pro
The final touches are all about the financials—adjusting for taxes, tacking on discounts, and noting how the customer paid. Getting these details right is essential for your own bookkeeping and gives your customer a complete picture of the transaction.
For example, you can easily apply a local sales tax as a percentage or add a flat-rate discount for a special offer. A classic example is giving a new client a 10% discount on their first project. Instead of breaking out a calculator, you just pop in the percentage, and the software does the rest.
Finally, always specify the payment method. Whether it was cash, a credit card, or even Apple Pay, noting it on the receipt provides a complete record for everyone. This little detail makes reconciling your accounts at the end of the day so much easier. If you want to see how all these elements can come together, take a look at our huge library of receipt templates for some inspiration.
Fine-Tuning the Details for an Authentic Look
Once you’ve plugged in your branding and line items, it’s time to focus on what separates a good receipt from a great one: the authentic details. A plain digital file gets the job done, but the small touches are what make a receipt convincing—whether you're handing it to a client, filing an expense report, or using it as a prop. A powerful free receipt maker gives you the tools to move beyond a simple list of items and create something that looks like it just came from a real cash register.
It all starts with the font. Sure, standard fonts like Arial are clean, but choosing one that mimics a physical printout adds a whole new layer of realism. Many tools now offer specialized thermal printer fonts that perfectly replicate the slightly imperfect, dot-matrix look of a real receipt. It’s a small tweak that makes a huge difference.
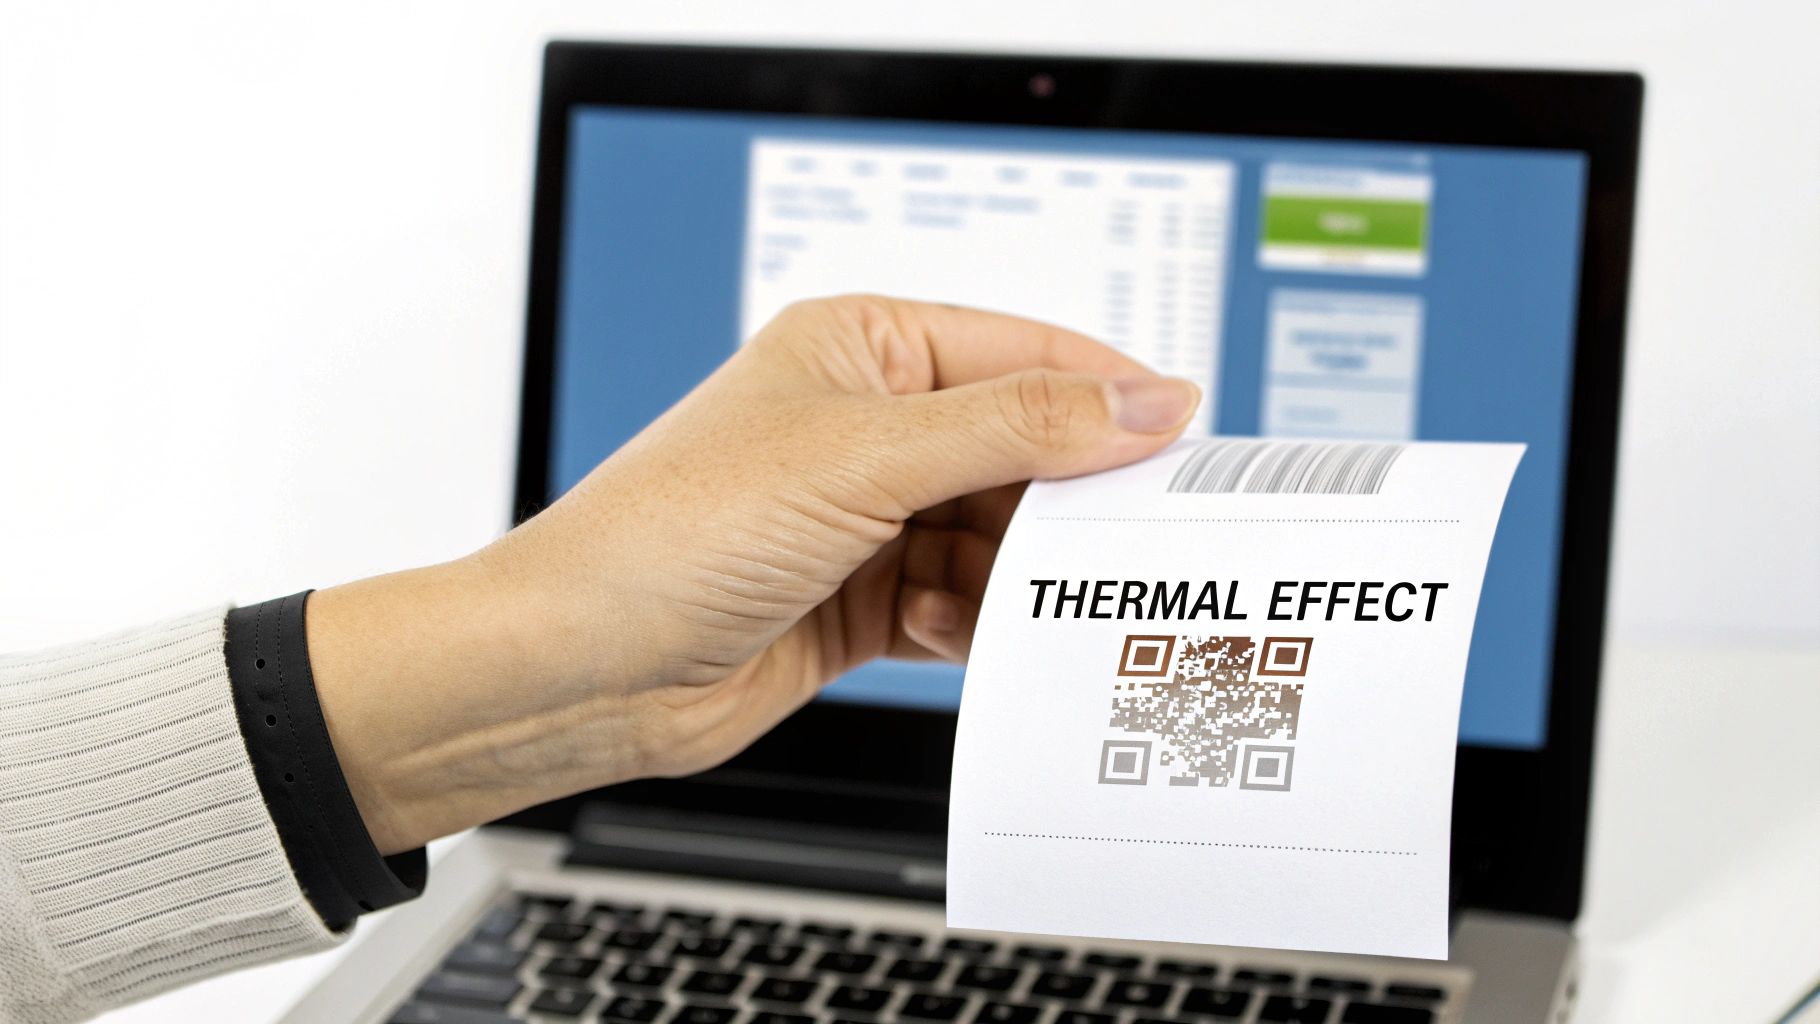
Adding Texture and Realistic Effects
Why stop at the font? You can also make the "paper" itself look real. Applying a subtle paper texture gives the background a physical quality, a far cry from a flat white screen. Some tools even let you add effects that look like creases or aging—perfect for situations where a receipt needs to look like it's been tucked away in a wallet for a few days.
But the most powerful feature for authenticity is easily the thermal print effect. This goes way beyond just a font choice. It actually simulates the slight bleeding and minor inconsistencies of ink hitting thermal paper, giving you a final product that looks incredibly convincing.
Honestly, this effect is a game-changer. It's the difference between a document that looks like a receipt and one that feels like it was just pulled off a roll at the checkout counter.
Completing the Look with Functional Elements
To really nail the professional look, think about adding the functional elements you see on receipts every day. These finishing touches add another layer of authenticity and can even have practical uses.
- Barcodes and QR Codes: Pop in a barcode for the transaction ID or a QR code that links back to your website. It makes the receipt look official and tech-savvy.
- Custom Footer Messages: Don't forget the footer. A simple "Thank you for your business!" or your return policy adds a professional, personal touch.
- Headers and Notes: Use the header space for a special promotion or add a notes section for any unique details about the sale.
By layering these visual details—from the right font and paper texture to functional codes and custom messages—you can create a document that's both polished and impressively realistic. If you need a refresher on the basics, be sure to check out our complete guide on how to make a receipt.
Saving, Exporting, and Managing Your Receipts
Once you’ve nailed down all the details and your receipt looks just right, the final step is getting it out into the world. You need to send it, print it, or just keep it for your own records. A good receipt maker makes this part easy, turning what you just created into a useful, manageable part of your financial workflow.
The most common first step is getting a copy of the receipt. Different needs call for different file types, so having a few options is incredibly helpful. You'll want to be able to instantly download your receipt in a format that makes sense for the task at hand, whether you're emailing a client or just printing a hard copy.
Picking the Right File Format
It might seem like a small detail, but choosing the right export format can make a big difference in how professional your receipt looks and functions.
- PNG: This is perfect for quick digital sharing. If you need to text a receipt to a customer or pop it into a Slack message, a PNG gives you a sharp, clean image.
- JPEG: JPEGs are generally best for anything web-related, like uploading to an online expense portal. They're universally accepted and help keep file sizes down.
- PDF: This is the undisputed champ for professional documents. A print-ready PDF is what you’ll want for emailing official invoices, printing on standard letter paper, or even formatting for an 80mm thermal roll to get that authentic point-of-sale look.
Being able to export a PDF formatted specifically for a thermal printer is one of those small features that’s a real game-changer. It’s what separates a generic digital file from something that looks and feels like a tangible proof of purchase.
Why Creating an Account is a Smart Move
Sure, you can whip up a one-off receipt without ever signing up. But if you find yourself making receipts more than once, creating a free account is where the real magic happens. This is how the tool goes from a simple generator to a genuine management system. The online receipt maker market has seen a massive 16.33% compound annual growth rate from 2020 to 2025 for a reason—people need this kind of efficiency. You can dig into the numbers on the online receipt maker market growth on datainsightsmarket.com.
Signing up unlocks a couple of seriously useful features, but the biggest win is the ability to save your work.
Think about a freelance designer who juggles a handful of regular clients. With an account, they can create a master receipt for each client, complete with their logo and business details, and save it. The next time they need to bill that client, they don’t have to start from zero. They just open the saved receipt, duplicate it, tweak the date and line items, and it's ready to go.
This simple habit can easily cut your admin time in half. What used to be a chore becomes a quick, two-minute task. Your saved receipts effectively become your own personal library of templates, ensuring everything you send out is consistent and saving you a ton of time.
Real-World (and Ethical) Ways to Use a Receipt Maker
A free receipt maker is one of those tools that seems straightforward on the surface, but its real value lies in its flexibility. Sure, it’s perfect for generating a quick sales record, but the practical uses stretch far beyond a simple transaction. That’s what makes it such a powerful resource for people in all sorts of fields who need legitimate proof of purchase.
For a small business owner, the main benefit is obvious: creating clean, professional receipts on the fly. But for employees and independent contractors, it's an absolute game-changer for expense reports. We've all been there—you lose a receipt from a client lunch or can't find the email for that software subscription. Being able to accurately recreate the details for reimbursement is a common and perfectly legitimate need.
More Than Just a Sales Slip
The applications get even more interesting when you look at more creative and technical professions. A good receipt maker can be an indispensable tool in some surprising situations.
Think about these real-world scenarios:
- Software Testing: A QA team is hammering away at a new e-commerce app, and they need to test the entire payment flow. A receipt maker lets them create tons of realistic transaction data to see if the system holds up.
- Film and Theater: A prop master is tasked with making a scene feel real. Part of that is filling a character's wallet with stuff that looks authentic, and that includes believable receipts from a coffee shop or a gas station.
- Education: A business professor wants to give students a hands-on lesson in invoicing and expense tracking. This tool provides a perfect, practical way to demonstrate how it all works.
This need for better documentation tools is part of a much bigger picture. The entire invoice management software market is projected to grow at a CAGR of 7.1% between 2026 and 2034. It just goes to show how critical these tools are for keeping operations smooth. You can dive deeper into this trend with a market analysis from The Insight Partners.
A Quick Word on Using It Right
It’s really important to use this tool with integrity. It was designed for honest record-keeping, verifying legitimate expenses, and helping with creative projects.
This tool is here to help you handle valid business and creative needs—nothing more. It's built on trust and is strictly intended for ethical uses like replacing a lost receipt, managing your expenses, or supporting a professional project. Using it for anything fraudulent or deceptive is not what it’s for.
Our goal is to give you a resource that makes your work easier and more efficient. Whether you're a freelancer making sure you get paid back for an expense or a developer testing a new payment gateway, a receipt maker provides a simple, professional solution for all your legitimate documentation needs.
Frequently Asked Questions
Even the best tools can have a bit of a learning curve. Let's tackle some of the most common questions that pop up so you can get back to creating great-looking receipts without a hitch.
Is My Data Safe When I Create a Receipt?
This is a big one, and we take it seriously. The short answer is: yes, absolutely.
Everything you type into the receipt maker—your business name, customer info, line items—is protected with HTTPS encryption. Your data is processed on the fly and isn't stored or shared. It’s yours and yours alone.
If you decide to create a free account to save your work, that information is stored securely for you to access whenever you log in.
Do I Have to Sign Up to Make a Receipt?
Nope! You can jump right in and generate a professional receipt immediately, no account needed. We built it to be fast and accessible for those one-off situations where you just need to get something done quickly.
That said, if you find yourself making receipts regularly, creating a free account is a game-changer. It lets you:
- Save your receipts so you always have a record.
- Duplicate existing receipts in a single click—perfect for repeat customers.
- Edit receipts later if you need to make a correction or add a note.
Can I Add My Own Logo to the Receipts?
Of course, and you definitely should! Adding your logo is probably the single best thing you can do to make your receipts look polished and build brand recognition.
It's super straightforward. Just find the option to upload your logo file, and it will automatically pop into place on the template.
A custom logo transforms a basic proof of purchase into a professional document that represents your business. It’s a small detail that makes a massive difference in how your customers see you.
What File Formats Can I Download?
You've got options to fit whatever you need. Once you’re happy with your receipt, you can export it as a:
- PNG: Great for sending digitally or embedding online.
- JPEG: Another solid choice for web and digital use.
- PDF: The go-to for professional emails and printing.
Our PDF export is also specially formatted to work with standard paper and 80mm thermal printer rolls, giving you that authentic point-of-sale look if you need it.
Ready to give it a try? Head over to Receipt Maker and create a professional receipt in just a few clicks.